

I used to post Rays (Sunbright57) photo's for him :-
cheers all Danny
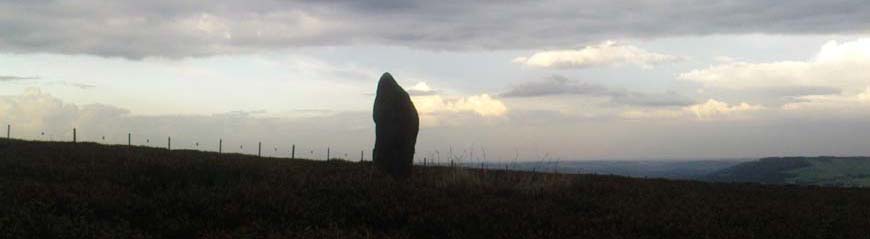
QDanT wrote:Hi Ray asked me to post this :-
cheers Dany
I'd had a few enquiries as to how, so I came up with this Tutorial, there's other ways this is just how I do it,Sunbright57 wrote:Thanks Danny, how you managed that some secret to tell. It's by trial and error that I find things out on my pc, but reading the instructions is the best way ! Cheers. Ray
I did this to help anyone on TNA who wanted to put photo's on but wasn't shure how.QDanT wrote:
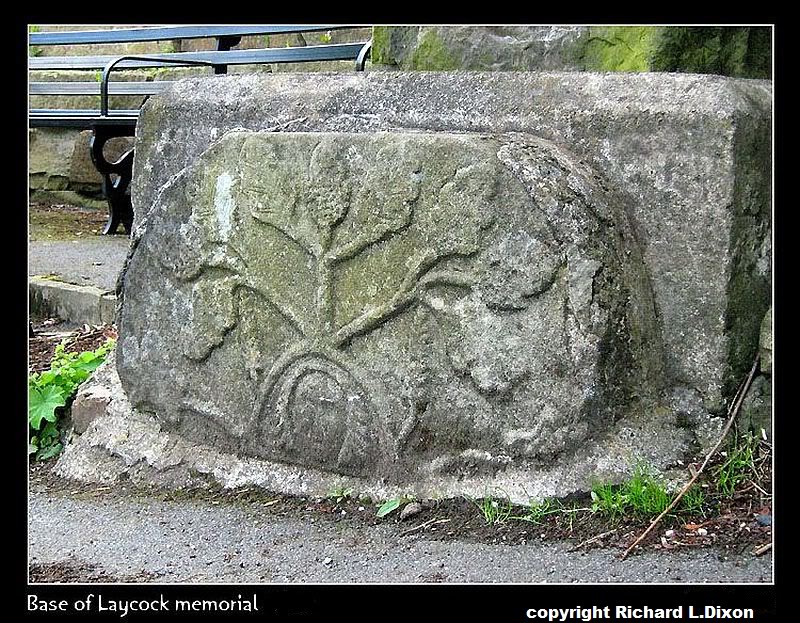
Having a few comments as to how I get photo's on, and No! it's not Voodoo! and posting one for Ray here's a tutorial:-
Have a folder with the photo's, you want to post, sized 800 x 600 (photobucket will do it for you, but this is how I do it)
Sign up for a free account with photo bucket http://photobucket.com/
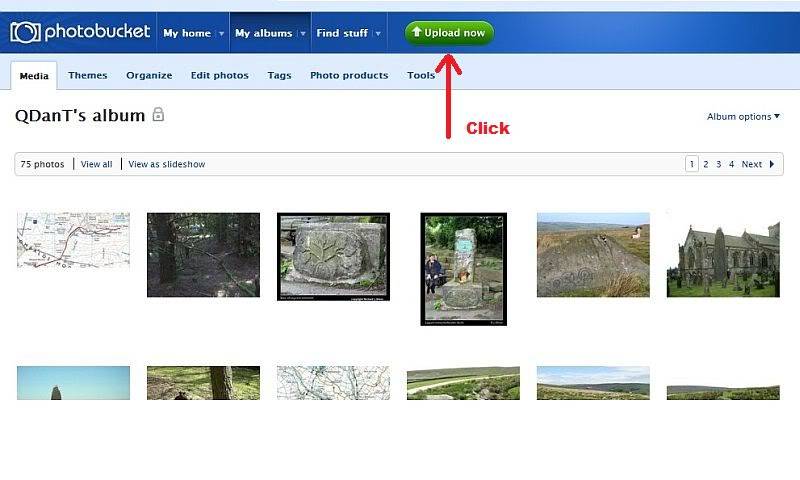
Sign into your Account if you're only adding one photo you can upload it to the main album but if I've several for an article I put them in there own album - click up load now
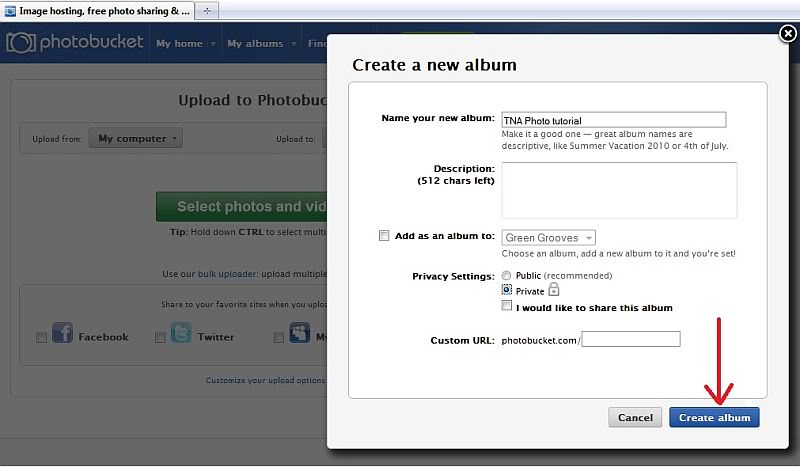
click create new album
name it and then decide if you want every freak and nutjob out in ciber space to be able to see it ? I click Private then create album
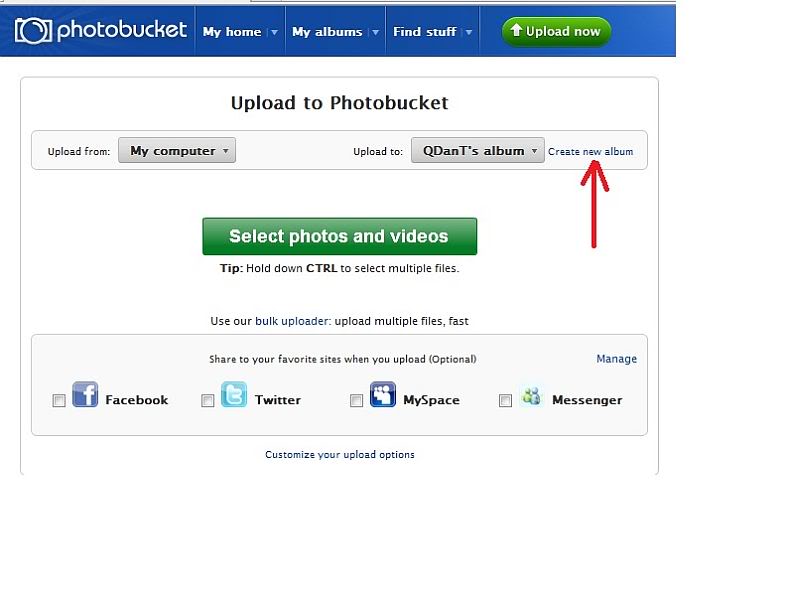
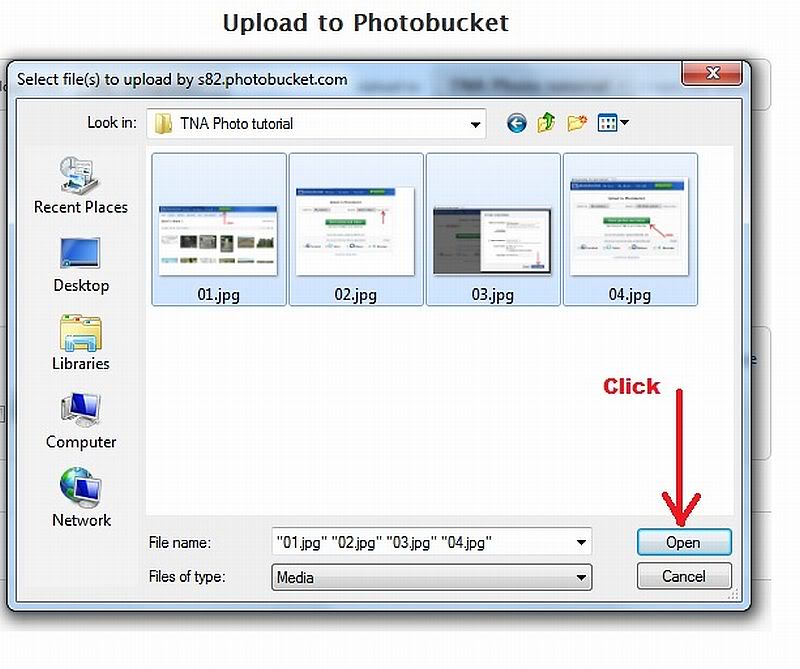
in next screen click select photo's and browse to the folder there in
highlight as many as you want to upload by either mousing a box round them or holding Ctrl down and left clicking them then click open
when they've finished uploading you get a chance to see them as thumb nails then click save and continue to album
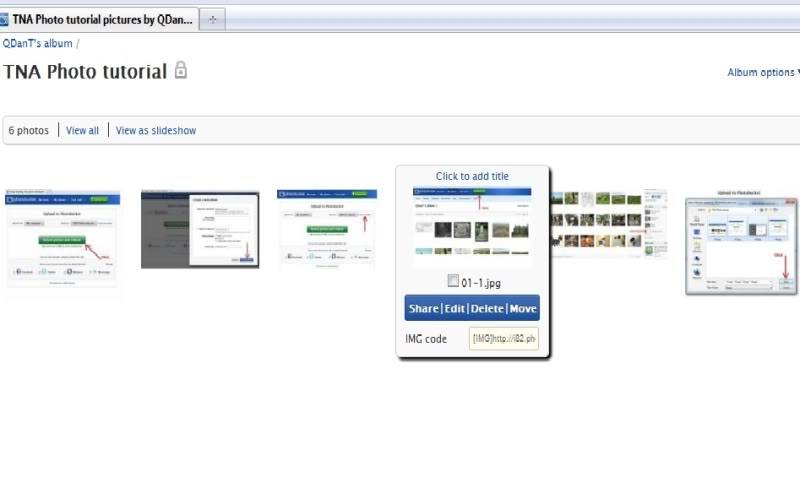
when there in their album if you put the mouse over a thumbnail a drop down box appears, if your only after one photo click in the Img code box and this puts it onto your clipboard.So you can then click paste in your TNA topic where you want the photo to appear, you just paste it into the message you do not need to use the add photo icon at the top.
If you've several photo's for an article what I do is put a tick in the box at the bottom of the page then in the drop down box click "generate link codes for selected"
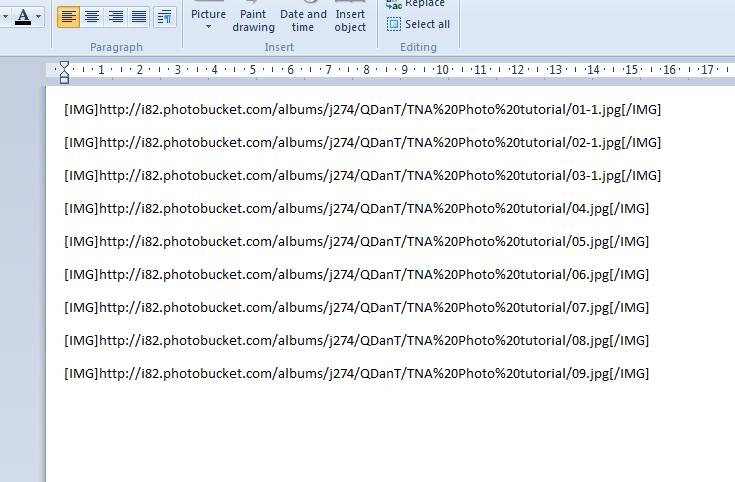
another window will open click any where in the "full size" box
it will say copied. I then open "word" (note book will do ) and click paste
one glitch I've noticed is that when uploading a few photo's Photobucket puts them in order uploaded and smaller files load quicker so sometimes the list is out of order, but it's easy to shuffle them around in "word".
Then as your writing an article when you come to wanting a photo open "word" highlight the link click copy back to the article click paste. Reading this it sounds complicated Voodoo and there's probably easier ways but it's how the Bear showed me.
Danny


cheers all Danny
